Friday, August 31, 2012

The Economics of Good Coffee


Some of you may be a bit confused by the title of this post. What are the "economics" of good coffee? Why not the "art" of good coffee?
Well, for one, I'm not a professionally trained barista with enough knowledge to tell you the art of good coffee, so I'm not going to pretend to do so and give you incorrect information (that would just be mean). And two, I am a business student, so I know a bit about math and money, which is what I'm going to focus on here.

Drinking coffee is a habit that numerous people all over the world have developed. While it's more prevalent in some nations than others, it's fairly safe to say that the whole world has a bit of a love affair with the tiny bitter beans.

I myself have a huge coffee addiction, which you probably figured out since my name is The Coffee Breaker!
My addiction is less about the caffeine, however, and more about the feeling that I get from drinking a huge mug of smooth and delicious coffee. Whenever I'm settling down to get some work done, starting a new novel or relaxing with friends, nothing fits better than a cup of coffee. What can I say, it's my comfort food!

If you suffer from a coffee addiction like me, caffeine or comfort-food induced, you may just grab one of these every day.

But that gets expensive after awhile. Which is why most people I know have taken to purchasing their own coffee and roasting it at home. Unfortunately, to save money, many people have settled for buying less-than-excellent canned coffees over fresh-roasted beans from their local cafe. And while the canned brands may give you more coffee grounds for your $$, you end up using twice as much coffee to get the same amount of flavor from fresh beans.

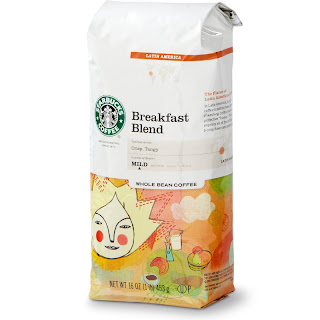
For example, let's take a bag of Starbucks Coffee.


You can get this 1 lb bag of beans for $11.95

1 lb / 2 tablespoons per 6 oz of Starbucks blend = 16 cups of delicious coffee


Now I'm going to pick on Maxwell House brand, because I've had some thoroughly horrifying experiences with this coffee. In my opinion, it produces a thoroughly stale and unnatural cup of java.


You can grab this 31.5 oz can of Maxwell House coffee (1.97 lbs) for $11.84 and think that you just got a great bargain. After all, you just got twice as much coffee as the Starbucks blend for the same price, right?Unfortunately, with canned coffees, you often have to use twice as much of the grounds to produce the same flavor as freshly ground beans.

So, 1.97 lbs / 4 tablespoons of Maxwell House = 15.76 cups of "somewhat okay" coffee.

Therefore, buying the fresher beans gives you better coffee and more of it when you get down to the math. 

Okay, sorry about that little economical rant I just did. I promise, I'll control myself better for the rest of this post.
Anyways, besides purchasing your own beans and roasting them at home, there's numerous other ways to make your own little cafe in your kitchen. One option is grinding your own beans.


Freshly ground coffee provides a lot more flavor. If you want a simple grinder, go for this Krups model.


Reliable and economical (around $20 at your local Bed Bath and Beyond, or available here).

If your find yourself purchasing a lot of lattes and cappuccinos, pick yourself up a simple milk frother. I got this model from Sur La Table for $12.
If you want to make truly professional cappuccinos and lattes, this Nespresso frother really can't be beat.


This frother (and a steady hand) allows your to make cappuccinos like this:


You can order one online here.


And if you really want to make your own Starbucks-style caramel macchiatos, cinnamon dolce lattes, etc., spring for a few bottles of Torani flavored syrup.


Play with flavor combinations to make your own specialty coffees. I like sprinkling a dash of the caramel syrup into my black coffee every now and then. It's my own lighter version of a caramel latte. The full six-pack is available here.

Like I said, the love affair between coffee and us humans isn't going to end anytime soon. So if you want to feed your addiction without dropping hundreds of dollars on frappuccinos and lattes every week, invest in some simple home goods to build up your very own mini-cafe.

Enjoy!
xx


Follow Me on Pinterest

Monday, August 27, 2012

Crumbly S'more Bars

I've always been a sucker for s'mores. 
Unfortunately, being a summer treat, I can really only eat them during the June-August season. Making them in the microwave or the toaster oven is never as good as the fire-scalded marshmallows shoved between two graham crackers as you try to balance the roasting stick flavor that just drips out of a woodland summer s'more. 
Fortunately, there are ways around that little problem.


These Crumbly S'more Bars take a childhood classic and dress them up for an indoor adult world scene. Using the same ingredients as a basic s'more, plus a little bit of butter, you can have your own ooey-gooey summer treat during any season.

You will need:

9 sheets of graham crackers, plus one
1/2 stick of butter, melted
1 cup chocolate chips, plus 1/2 cup melted
1 3/4 cup mini marshmallows

Preheat your oven to 375 degrees F.

Start by grabbing your graham crackers and mashing the first nine sheets into a fine powder. If you have a food processor, they help a lot with this step. If not, shove them in a bag and grab a rolling pin!


Pour your graham crackers into an 8x8 pan and add your melted butter. Using a fork, press the butter into the graham crackers pieces to form a wet crust.


Place your pan in the oven and bake for 7 minutes.

Next, grab your chips. Be sure they're milk chocolate and not semi-sweet! We have to remain faithful to the original s'more recipe!


When your crust is done, top it with 1 cup of chips. Bake for 2 minutes.


Next, add your marshmallows and bake for 3 minutes. They should puff up like little mini pillows.


Take your 1/2 cup of melted chips and drizzle across the top. Be creative here and experiment with funky patterns. The chocolate is your brush, and the dessert is your canvas!


Finally, take your last sheet of graham cracker, and crumble it up in your hand. Sprinkle the crumbs across the entire dessert.


I recommend waiting at least an hour to cut these if you want to serve them in neatly cut bars (the marshmallows need time to harden). However, they're ridiculously yummy when they come straight out of the oven, so feel free to cut off a chunk and enjoy the buttery chocolatey goodness.


Follow Me on Pinterest

Friday, August 24, 2012

Turtle Brownies

I love the taste of caramel. It instantly reminds me of fall and Halloween when I used to horde caramel apple suckers and snack on them all through October.
Getting back to the point, caramel is a delicious reminder that fall is approaching. It also goes great with chocolate.


I believe I've made my point.

These utterly simple and oh-so-delicious Turtle Brownies are an excellent combination of chocolate and caramel. Since the recipe makes a huge amount of brownies, I've used them as a "thank-you" gift to countless people, and they're always well-received. I also like to wrap them up in cute tins and give them away around Christmas time. Trust me, people love it!

To make a batch of these for your own gift-giving needs (or to gobble them all up yourself), you will need these ingredients:

1 1/2 sticks butter, softened
1 package German Chocolate cake mix
1 can evaporated milk
1 package individually wrapped caramels
1 12-oz package semi-sweet chocolate chips

Start by preheating the oven to 350 degrees F.
Combine 2/3 cup of evaporated milk, butter, and cake mix. Spread half of the mixture across the bottom of a well-greased 9x13 baking pan. The mixture will seem super-thin, but don't worry, it will puff up to about 3x the size during baking.
Then, place the entire pan in the oven and bake for 7 minutes.


While you're waiting for your base to cook, unwrap your caramels and put them in a small saucepan. Pour 1/3 cup of the evaporated milk on top of the caramels and heat on low until they melt. Be sure to stir continuously! Nothing makes a kitchen smell gross faster than the smell of burning sugar.


Once your brownie base is cooked, pull it out of the oven and evenly spread your chocolate chips across it.


Next, pour your caramel mixture over the chocolate chips.


The last step (and the most fun) is to take the remaining cake batter and spoon it on top of your brownies. No need for even coating here - just slap dollops of batter onto the pan wherever you see fit!


Now, place your brownies back in the oven and wait an ungodly 30-40 minutes for the batter to finish cooking and all of the caramely-chocolatey goodness to fuse together.


These are best eaten right out of the oven so you can appreciate the chocolate-caramel lava domes oozing throughout the brownies. Every forkful punctures a new patch of ooey-gooey goodness.


Like I said, these make great gifts. But only if you're willing to part with them!

Follow Me on Pinterest

Wednesday, August 22, 2012

Steve & Rocky's

It's incredibly difficult to find good seafood in the midwest. With no oceans nearby, shellfish must be flash-frozen and trucked across the mainland, hiking up the price. As a result, most restaurants opt for the cheaper and less-tastier options, like boxed and frozen fish.
However, in this barren space of land and lakes, several beacons of culinary mastery taste as though they have their own ocean somewhere back in their vast kitchen.
One of these beacons is Steve and Rocky's.


Their newly re-vamped decor matches the underwater luxury of their menu. Everything is light, wavy and feels as though you're dining just off the coast.

This restaurant has been a favorite of my parents' ever since they moved here from Florida. So, naturally, it made sense when my mom invited me to Steve and Rocky's for my dad's birthday dinner.

Here's the birthday boy!


The menu at Steve and Rocky's changes daily, but I had to check out their extended summer menu. (Psst! Note the lunch prices! This place serves excellent dishes for lunch at more-than-reasonable costs)


While the summer menu was certainly tempting, I had to try one of their traditional entrees.

First up - fried green tomatoes and prosciutto in a creamy tomato-basil sauce.


It tasted a bit like a fried tomato parmesan!

Next, the dinner entrees. Mom opted for salmon..


The birthday boy got the 28 oz filet and potatoes...


And I got the scallops and gnocchi..


Remember how I said good seafood is hard to get in the midwest? Well, scallops are particularly difficult to keep light and soft without soaking them in salt water, which makes them taste gross. These scallops were so silky and buttery, I felt like I was back in Florida dining off of Lido Key.


Of course, it's not a birthday without dessert, and you really can't pass up Steve & Rocky's dessert menu.


A mascarpone cheesecake for Dad...

And a hot chocolate cake for me and Mom!


An ooey-gooey mug cake with a liquid center and a dollop of melting vanilla ice cream on top. Want to know how molten and delicious this cake was?


Yeah, that molten and delicious.
If you decide to stop by, just get the whole dessert tray sampler! That's my plan for next time I'm in town.


Follow Me on Pinterest